kendallnhurley.com

Welcome to my whimsical world!

Let’s Make Some Split Pea Soup – P.S. I Hate Soup — April 4, 2022

Let’s Make Some Split Pea Soup – P.S. I Hate Soup

Let’s cut to the chase: I don’t think soup is a meal, I think it is a hot condiment that is only good for dipping bread into, and only when necessary. Soup to me a dish I make when I have to use up stuff in my fridge or I have to make a lot of food for people. It’s a good staple food to know how to make, because it is so versatile, but I am extremely picky about eating it.

Kendall, why are you making soup if you obviously dislike it so much? Well, my Norwegian husband loves split pea soup. So does my dad. For them, it’s a comfort food. So while I don’t plan on eating much of the green stuff, I know that they will literally eat it up. Sometimes, food is a labor of love. So let’s make it!

Photo by Farhad Ibrahimzade on Pexels.com

P.S. My recipe is totally vegan, but it is optional to add ham or sausage towards the end if that is your thing.

You will need:

2 cups split peas

Half an onion (I use a sweet yellow onion)

2 large carrots

A few sticks of celery

6 cups of water

2 tablespoons oil

Salt and pepper to taste

To begin, add the oil to a big pot and turn on the heat to medium. Chop your onion into small-fish pieces and sauté in the oil until translucent. Chop and add in the carrots and celery. This is the basis for most soup recipes, and makes a mirepoix, FYI.

Cook for a few minutes, then add in your 2 cups of peas. Pro tip: most grocery stores sell split peas in 2 cup baggies, for less than $2, making this a very cheap meal. Add in the six cups of water, and toss in the spices and salt. I like to make it easier on myself and use spice mixes, like salt-free lemon pepper. Lower the heat to medium low, and allow to simmer for an hour.

Amazingly, this soup becomes a nice much (that’s the best way to put it) after an hour to 90 minutes. Toss in pre-cooked ham, shredded chicken, or slices of sausage if you want. Mix up once more and serve!

I like to serve this with peanut butter and saltine crackers on the side, because that’s how my dad likes it. My husband will eat this hot or cold the next day with tortilla chips.

If I’m going to eat soup, I prefer a thicker puree like this one. It’s cheap and easy to make, and you can freeze the extra to defrost later.

How I use pumpkin + DIY pumpkin purée — October 26, 2019

How I use pumpkin + DIY pumpkin purée

It’s fall y’all! I’ve already written one post this season about squash, but I’m on a train I don’t want to get off of. I’m embracing my inner #basic and eating all the seasonal veggies this year.

While I don’t love pumpkin spice lattes, mostly because I’m not a coffee drinker, I do use pumpkin in a variety of ways this time of year. Actually, I should be using it year-round, but fresh, local pumpkins are cheapest right now. You can always get the canned stuff, but clearly I enjoy taking the longer DIY route. This is how I purée pumpkin/other squash, but it’s pretty simple.

First, I use pie pumpkins. They are sweeter and smaller, and easier to deal with. After washing, I cut off the top like you would if you were carving a pumpkin, then gut it. I save the seeds for roasting, which I do afterwards. Then I use my big knife to cut the pumpkin into approximately four even pieces, then set them on a lined baking sheet and pop them into a preheated oven at 400F for at least an hour. I’ve tried both setting the pumpkin flesh side up and down, and I don’t think it affects the end products much.

Then I wash the seeds and toss them in either seasoning salt or some paprika. These make a great salty snack alternative to chips and popcorn. Or you could use them in a salad! Once the pumpkin flesh is soft and you can stick a fork all the way through it, I take it out and let it cool some. Then I peel the skin off and roughly cut the flesh up. Then I add that with a little bit water to my blender and purée for 20-30 seconds. Pour it into an airtight, reusable container and voilá! Easy as (pumpkin) pie!

Even though it takes longer, I think it is fun and can be worth it to make your own pumpkin purée if you can get local pumpkins. I ended up with four and a half mason jars of purée from two pie pumpkins, which were apiece the cost of one can of the store bought stuff.

What do I do with it all? Well, last night I made a delicious pumpkin soup that was so yummy and simple. I simply heated up a jar of the purée with some veggie broth, added sautéed onion and garlic, popped in leftover roasted veggies and chicken, and it was amazing. And so simple to throw together!

I do plan on making a pie, but my favorite way to consume pumpkin is with a pumpkin spice chocolate chip muffin. These are also super simple to make and are a hit at any party. Simply add the pumpkin in place of egg and oil to a spice cake mix (or you can do it from scratch) and fold in chocolate chips, then bake like normal. These are perfectly sweet and there are dozens of other recipes online you can follow. They are just perfect!

I’m also interested in trying out a macaroni and cheese recipe that incorporates puréed squash, but I haven’t tried it yet. Pumpkin is full of fiber and vitamins A and C, so I feel like those muffins are “healthier” than other recipes. How do you like to eat pumpkin?

#BudgetEating: Are store-brand snacks the same as name brand? — October 15, 2019

#BudgetEating: Are store-brand snacks the same as name brand?

Y’all should know by now that I am a sucker for a good deal, especially when to comes to going to the grocery store. I purchase a lot of items with store-brand labels because they typically are a lot less expensive than name-brand items. But I do wonder – are store-brand and name-brand the same thing? What is the difference between the two besides price?

Well, I’ve a little digging and I’ve come up with a few answers. In addition to being much cheaper than name-brand products, store-brand food, beverages, cleaning supplies, over-the-counter medications and everything else tend to taste and work just the same. In my experience, the only discernible difference comes down to taste in things like chips. Store-brand Cheetos are just not the same level of cheesiness!

I personally am going to stick to buying store-brand as often as possible. It makes my bank account very happy. I would advise you though to always check the ingredients on something you aren’t sure about, just in case.

There are occasions when you should save the money and when you can splurge. On the rare occasion I host or attend a party, I usually bring a couple of bags of store-brand chips or some crackers, or store-brand fizzy drinks. Honestly, no one can really tell the difference!

The only caveats to me not buying store-brand is if I cannot find the store-brand equivalent to a name-brand product or if the item is on sale and already less expensive. And after trying all the varieties of Cheetos out there, I can assure you that name-brand is the best.

What are some store-brand alternatives you prefer to buy?

#BudgetEating – Butternut squash soup — October 11, 2019

#BudgetEating – Butternut squash soup

There isn’t much better on a crisp fall day than relaxing with a bowl of warm, thick, savory soup. One of my favorite fall veggies is a butternut squash. I tried to go them myself in the garden this year, but I’m stuck buying one from the store or my local farmer’s stand.

Squashes of all kind are perfect in a variety of dishes. One of the accounts I follow on Instagram, Once Upon a Pumpkin, is a registered dietician and has tons of great squash recipes year-round. However, this is my own recipe I came up with last year. Now, I am not a RD, so feel free to add any of your own tips to make this recipe even better.

You will need:

  • Peeler
  • A baking tray
  • Sharp knife
  • Cutting board
  • Large pot
  • Blender

Ingredients:

  • One butternut squash
  • Two tablespoons olive oil (and one more for later)
  • Salt and pepper to taste
  • Rosemary to taste
  • A few garlic cloves
  • 2 cups veggie or chicken broth
  • Half an onion
  • Optional: Paprika or cayenne for a kick!

Step one: Wash and peel the squash. This makes cutting it much easier later on. I usually use a bowl in the sink to catch the peels. Preheat the oven to 425F.

Step two: Chop the squash into disks, then into semi circles. I use another bowl to hold the chunks.

Step three: Coat the squash pieces with the two tablespoons of olive oil and salt and pepper and rosemary.

Step four: Lay the pieces out on the baking sheet. I like to use non-stick for this. Pop them in the oven for 60-90 minutes, depending on your oven.

Step five: Peel and chop the garlic and onion. Sauté in the pot with the other tablespoon of olive oil (you can use other kinds of oil too) until soft.

Step six: Once the pieces of squash are nice and soft, add them in batches to a blender. You can use the broth to help with the blending. Add the mixture to the pot.

Step seven: Stir to combine the mixture and heat through thoroughly. You can add the rest of the broth to make the soup more of a liquid texture. Personally, I prefer this soup on the thicker side.

Step eight: I also like to add roasted veggies, sausage, shredded chicken, or pasta/rice/quinoa afterwards prior to serving to add some texture and additional nutrition. But you can eat it just as is!

I try to keep all my recipes really basic, because cooking doesn’t need to be complicated. You can have someone else help you chop the squash if you are a beginner with knives. You can also use a hand blender instead of a normal one, if you have that.

This soup keeps in the fridge for several days in an airtight container, or put the extra in the freezer for meal prep later on. One squash does make a big batch!

This time of year, squashes of all kinds are in season, so pick up one today and give homemade soup a try! They aren’t expensive, one organic butternut squash should be around $4 and the rest of the ingredients you should have on hand. You can eat this ish for days.

Butternut squash is full of fiber and vitamin A, so it is really healthy. Not only does this soup taste great, especially if you make it your own, it is perfect for the season.


#BudgetEating: My rhubarb soup recipe — October 6, 2019

#BudgetEating: My rhubarb soup recipe

Yes, you read the title correctly! Rhubarb has been used for ages as a sweet and savory ingredient. Technically, it is a vegetable. Personally, I prefer rhubarb pared with sweeter stuff. Pies, candies, jellies – since rhubarb is so tart, it pairs excellently with sugar.

My Norwegian boyfriend introduced me to rhubarb soup after I had more rhubarb than I knew what to do with. My mom always made jams and pies with it, but I wanted to get more creative in my kitchen. In Scandinavia, they love rhubarb, and they serve rhubarb soup either hot or cold.

This recipe is super easy to make and customizable. I actually don’t use measurements for it anymore, because it all depends on how much rhubarb you have on hand. It’s also inexpensive to make, as everyone has access to a stove, water, and sugar.

You will need:

  • Several stalks of rhubarb
  • A pot, knife, cutting board
  • Enough water to cover the rhubarb
  • Some sugar (to taste, I usually use about half a cup)

Step 1: Cut rhubarb stalks roughly. They will break apart in the soup, which you want.

Step 2: Add the rhubarb and water to a pot, along with the sugar. Bring to a simmer, and cook until the rhubarb falls apart. Depending on the color of your rhubarb, the color of the soup will vary in pinkness.

Step 3: Test the soup for desired flavor. You can add more sugar or water, depending on the sweetness. You can also add a little potato or corn starch to thicken the soup.

Step 4: Serving! You can chill it and serve the soup as a refreshing, palette-cleansing dessert with whipped cream, or serve it warm with vanilla ice cream.

Rhubarb soup is subtle in taste but is lovely in the late summer and early fall. You can also make this recipe with pre-chopped frozen rhubarb from last season.

My thoughts on canned wine?! — September 26, 2019

My thoughts on canned wine?!

I’ve previously talked about my relationship with *adult beverages* before, but I wanted to talk today about something new and interesting I’ve discovered this year. Before I start, I want to encourage you all to drink responsibly and only if you are over the age limit in your country.

Canned wine has been making an appearance in grocery and drugstores in the past couple of years, and I have some mixed feelings about it. Overall, I like them, but there are a few downsides. I’m going to go through and talk about how they help portion control, the environmental impact and recycling of canned wines, the variation of types, the price range, and which one is my favorite.

Portion control?

These cans contain about 2 glasses of wine each, which makes them perfect for controlling how much wine you’re drinking in the afternoon/evening. Or for sharing! It’s unfortunately too easy to drink too much if you’ve got an open bottle of wine, so these cans make it easier to monitor your alcohol intake. Indulging every once in a while is one of the nicer things about being an adult.

The environmental impact of aluminum cans:

Aluminum is one the easiest to recycle materials we use on a daily basis. 75% of the aluminum in production today has been around since we started using it. Rather than glass or plastic drinking vessels, aluminum is more convenient for everyone.

The variation?

So many brands have jumped on the bandwagon of canned wine. Some have even been created just to market canned wine. There is a huge variety, so every wino can find something to their taste. Canned wines can be found in the liquor/beer/wine section of a store, usually near the boxed wine, but some is also in the chilled beverages section. Each  city/state/region is probably going to have it’s own selection of varieties and brands, but brands like House Wine and 14 Hands can be found pretty much all over the US.

Price range?

I’ve found that most canned wine costs between $3.99 and $5.99. When you consider that most bottles of wine go from $3 upwards, it’s not a bad price if you don’t want a whole bottle for a party or taking up space in your fridge. If you wanted to stock up on canned wines for a party, that might get a little pricy, in which case I would recommend a boxed wine instead.

These cans are perfect for an evening picnic at the beach or a BYOD (bring your own drink) to a party.

Which one is my favorite?

While I have (RESPONSIBLY!) tried a variety of canned wines, I am partial to the Chateau St. Michelle Raspberry Rosé canned wine. It’s a sweet, sparking rosé that it perfect to sip on after a long day at work. It doesn’t have a heavy taste and if you put it in a glass with some ice cubes, it is the ultimate treat yourself beverage. A can of this only costs about $4.99 and since I live in Washington, it’s local.

The House Wines Brut champagne is another good one, especially if you are celebrating in moderation. Again, it costs around $4.99, which is pretty average for a can of wine.

My overall thoughts? 

The only real drawback I see to canned wines is their price. Compared to a cheap bottle of wine and how much a can versus a bottle contains, you’re getting more for your money with a bottle. However, everything else makes canned wines appealing to my millennial mindset.

Please remember to drink responsibly if you do try out any of the wines I mentioned. I like to enjoy mine at home, with some snacks and good friends. (Jk, usually it’s just Netflix, my SO and Drypp.)


Budget Eating: DIY home grown PICKLES — September 18, 2019

Budget Eating: DIY home grown PICKLES

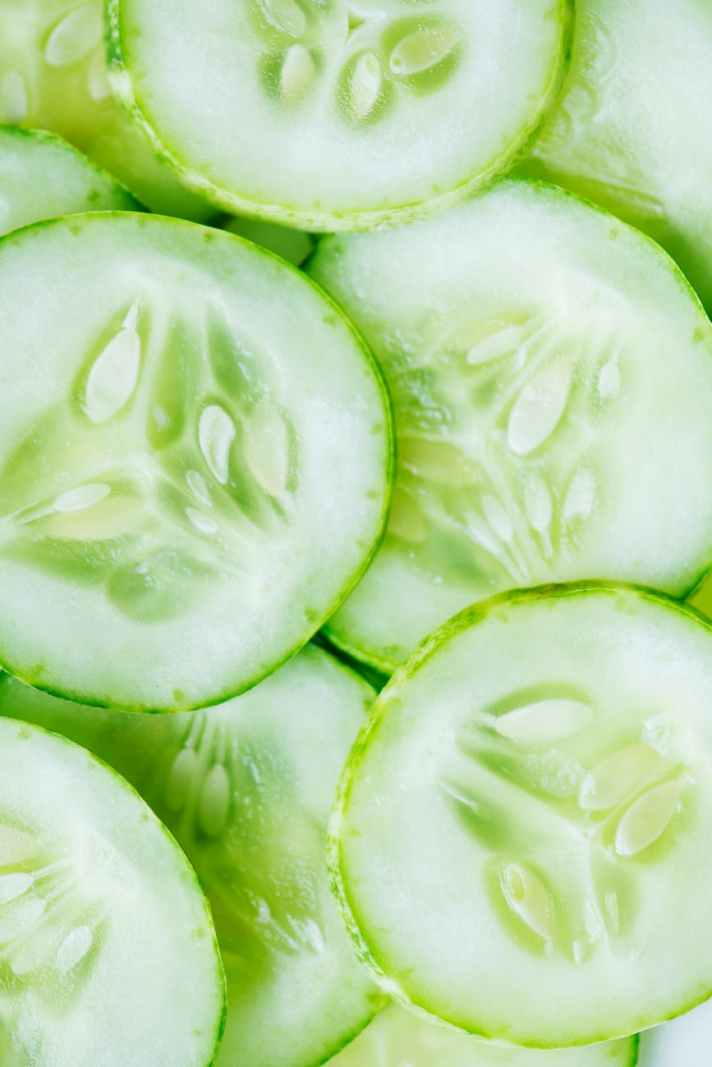
As some of you may already know, I have been growing cucumbers in my victory garden this year. A few weeks ago, I finally had enough growing and ready to be harvested that I was able to try my hand at making pickles for this year. Now, I am not a huge fan of pickles but I do like dill pickles and so does my boyfriend. I had also never made pickles before so I had to do some research first.

What I learned is that you can use either fresh or dried dill, which is what I happened to have on hand. I also read that you should use apple cider or white vinegar, and you can’t use regular table salt in the brine. It has to be kosher or pickling salt. So I picked all that up, along with a few other things, and got to slicing up my cucumbers. I decided to cut mine into circles, which made sense to me because I plan on using theses in sandwiches and on burgers.

Once I had all my cucumbers washed and sliced, I began preparing my brine. I didn’t use a specific recipe; rather, I ended up combining a few according to what I had and what I recall my mom doing as a kid. I used a 1:4 ratio of vinegar to water, with a tablespoon of sugar and 3 tablespoons of pickling salt. I brought that mixture to a boil and then let it cool in the fridge. Then I added 2-3 cloves of peeled garlic, along with 2-3 tablespoons of dried dill weed and a pinch of pepper to my jars. I used recycled glass jars for this, ones that I’ve been saving from pasta sauces and whatever else over the past year.

Then I stacked in my cucumber slices, making sure to get as many in as possible. I had probably 2 1/2 pounds of cucumbers, which filled 6 big jars. It is important to stack your slices in tightly, so when you add the brine they don’t float to the top and out of the liquid. Then I filled the jars up with the brine and put them all in the fridge, closing the lids tightly. Then I said a prayer that this would work.

They’ve now been in the fridge for not quite two weeks and I check them daily for mold or other spoilage. So far, so good! One thing I noticed in my research is that the pickles need to sit for a little while before you can enjoy them. I know I didn’t cut all the circles evenly, so next time I’ll be sure to do that so they all pickle evenly. That’s not a sentence I thought I’d ever say, but here we are! It was also quite interesting to see how each cucumber was different in shape and size; organic foods are so different than what you can get in the supermarket.

Have you made homegrown pickles before? If so, do you have any tips?

Reviewing Hello Fresh — August 23, 2019

Reviewing Hello Fresh

About a year ago, a friend gave us a coupon for a free week trial of Hello Fresh. You may be familiar with Hello Fresh or one of the many other meal subscription services out there. I cannot speak on any of the others, but I can review Hello Fresh for anyone interested in an honest review of their service and products.

First of all, these types of services are designed for busy people who want to cook or learn to cook fresh, homemade meals but lack the time to grocery shop and meal plan. While I don’t really fit into this demographic, I do think this is a really good idea. Eating healthy can be difficult as a young professional or busy family. Having the food and recipes delivered straight to you cuts out some of the guesswork.

Something else I liked was that you can choose your plan. Different portion sizes and plans cost more, with the 2 person, 3 meal vegetarian option costing the least. You can also choose which recipes you get each week, which I really liked. They send the recipe card which you keep, so if you liked the meal you can remake it. And all of the recipes are straightforward and easy to follow, so any level chef can take them on.

The quality of the ingredients was something I was concerned about, but everything arrived in good shape. The packaging was a little too much, in my opinion, lots of plastic. However, it all arrived in the time it was supposed to, and the cooling packs were still frozen. I definitely kept those and have used them for camping since.

In terms of time, Hello Fresh is supposed to create recipes where the food is prepped and cooked in about 30 minutes. This is another way it is ideal for a busy individual. What I will say, is to read the recipe through first, and lay out the ingredients in order. It is a relatively effective way to prepare a healthy meal in half an hour.

The biggest reason why I did not repurchase a Hello Fresh subscription is the cost. My first box was free, but I decided not to renew. When I crunched the numbers, I can spend less at my local grocery store and have more meals for the entire week than I can with Hello Fresh. I understand the convenience factor is huge for someone who has the budget for it, but it simply is not for us at this time.

Would I recommend Hello Fresh? I certainly recommend trying it out! I still make a couple of the recipes we got in our box, because they were a great hit. If you want to learn how to cook and your lifestyle and budget allow for it, then one of these meal prep services may be a good fit for you.

Due to the cost, but with all the other positive factors (time, quality, and the recipes), I would give Hello Fresh 4 out of 5 stars. It is simple an expense I cannot afford on a weekly basis, and I prefer to and have the time to meal plan and prep myself. However, I can definitely see how this service would be beneficial for some people.

What’s growing in my garden: An update — August 9, 2019

What’s growing in my garden: An update

Those of you who have been following along for some time now my be familiar with my Victory Garden. Today, I am going to update you all on what’s been going on in there, as well as what has been growing this summer.

We’ve had a few setbacks this summer with the garden. Namely, the rabbits who live nearby have been attacking us since May. They destroyed any chance we have this year of growing strawberries, peas, beans, and really did a number on our sunflowers. They should have bloomed by now, but with the help of some anti-rabbit spray, they have at least gotten off the ground.

We ended up having to construct a very rustic looking fence around the garden using chicken wire and leftover wood. It has helped immensely, although we have a few cucumber and squash plants that have crept through. Our soil is pretty rocky, so even with all the fertilizer we put down when we dug up the sod in April, things have struggled. That said, we have been finally seeing the fruits (and vegetables) of our labor.

We have had a very good lettuce harvest this summer, so much so that we have a salad with dinner most nights of the week. We grew butter crunch lettuce, which is slightly bitter but pairs well with a variety of other veggies. The tomato plants are putting out fruit, not as much as we would have liked but enough to make caprese salad and a couple of jars of tomato sauce. The cucumbers are having a good time, we have at least four that are still growing. It was really fun to watch the blossoms become my favorite vegetable.

The squash are looking good; I am growing butternut squash and baby pumpkins. These won’t be ready until the fall, but I’m excited. We are also going to have a great potato harvest, and the carrots have gone crazy. It is a little hard to pick them due to our rocky soil, but homegrown carrots are absolutely delicious. Everything it local and organic, so there is nothing added to anything in the garden.

Our fallen soldiers also include the beets and the onions. It’s been hard to see our money and work go to waste, but we have learned a lot on how to prevent the bad stuff from happening again, what grows well here, and how to care for what we have. The rhubarb, for example, has had a touch time putting down roots, but is finally happy. I am going to have a lot of rhubarb to turn into jam this year, so hopefully we won’t have to buy any this winter.

Our herbs have done well for the most part; I did give them all a haircut recently and they look much healthier without the dead leaves and stalks. Drypp loves fresh catnip, and we make mint tea a lot with the mint plant. (Pro tip: Rinse the leaves off first to eliminate the dirty taste.) Outside of the yard, we have berry bushes that are ready to be harvested this week, so I’ll probably add those to my jam. There’s a reason I’ve been saving all my empty jars; I can reuse them with my homemade sauces, jams, and pickles and hoard it away for the winter.

All in all, we’ve won some and we’ve lost some with the garden this year, but we will harvest more than what we’ve lost. Next year, we’ll improve on the fence and be more strategic with where we plant things. Overall, I’m happy with the outcome so far. I am excited to add more things to the garden next spring.

Budget Eating: Eating on a budget while also being environmentally friendly — July 11, 2019

Budget Eating: Eating on a budget while also being environmentally friendly

Shopping within a budget is crucial for me, but of equal importance is being as eco-friendly as possible when going to the grocery store. Over the past few years, I have learned several ways to cut down on plastic and packaging when I grocery shop. While I would like to do more, these simple tips are well within my budget and you too can easily implement them into your own life.

  • Bring reusable bags. This is a no-brainer, but everyone could benefit from doing this. Those plastic grocery bags, while recyclable, are a pain to recycle and not cost-effective for companies to recycle. So bring your own bag.
  • Have a fabric bag specifically for fruits and vegetables. Use this instead of the plastic bags they have hanging around the produce department. Fruit and veggies are fine without those bags because they naturally have skin to protect them. If you are worried about pesticides or banging them up, just wash them when you get home and store them properly.
  • Only buy what you absolutely need! This cuts down on food waste.
  • Check the labels on plastic containers to see if they can actually be recycled. Not all plastic is recyclable. If you have to buy something in one of these containers, try to reuse it instead of throwing it away.
  • Buy things in glass jars, paper, or aluminum instead, as these materials are recyclable. You can reuse glass as storage containers or to hold homemade soups, jams, sauces, pickles, broths, etc. Paper can be used for craft projects, composted, or as kindling. Aluminum is 100% recyclable.
  • If you can, go to a bulk store armed with jars and bags to stock up on things. Unfortunately, bulk stores often only exist in big cities, but some chain stores like Fred Meyer’s has a bulk section with things like granola and nuts. Bulk items are typically cheaper as well as good for cutting down on packaging.
  • Buy in-season fresh produce. Strawberries are not supposed to grow year round, and those that are made to do not taste as good. Oranges, squashes, potatoes, root vegetables, and avocados are all good wintertime veggies and fruits. Or stock up on canned goods.
  • Cut down on the amount of meat you buy. While humans are omnivores, too much red meat is not good for you. Try having meat in only one meal a day. If you have to have meat, go to the deli for a few pieces instead. They will also usually put your meat and cheeses into your own containers if you ask nicely.
  • When you can, buy local. Farmers markets automatically cut down of packaging. At the store, check the label to see where the food is from. The closer to home, the better for the environment. Locally raised and grown food has less distance to travel, therefore less of a carbon footprint.

person carrying basket of vegetables
Photo by rawpixel.com on Pexels.com

These are all the things I do to cut down on packaging and food waste. If we all do our part, even if it is small, our efforts to be kinder to the planet will culminate and large businesses will eventually listen. I know all these things seem insignificant, but if we all try, then we can make change.